Parenting Win of the Week: Holiday Baking
Here's how you can make every baking session with your kiddo special and memorable.

I love baking with my kids. Over the years it’s been amazing to watch them go from barely mixing the ingredients in the bowl to being able to pretty much read the recipe and gather the ingredients themselves. But those first few times you bake with your kids can be overwhelming and messy! So, we consulted an expert. Susan Sarich is the founder and CEO of SusieCakes, a delicious made-from-scratch bakery with locations in California and Texas (but her cakes ship nationwide!). She gave us her best tips for cooking with kids, plus an awesome recipe.

Courtesy of Susan Sarich
Any basic rules/tips/suggestions before you get started with baking that are important to teach children?
Baking with your little ones is not only a great bonding experience, but a wonderful opportunity to teach some of the basic rules of being in the kitchen. Of course, safety and cleanliness always come first! Ensuring they wash their hands and sanitize surfaces before starting is essential and will give them a great foundation.
Baking is also an opportune chance to introduce kids to knives and teach them they are not toys or something to be played with. Educating kids on the importance of knife safety (i.e., how to walk with a knife, properly hold and cut, etc.) and giving the responsibility of using this tool will also help grow their confidence in the kitchen!
Any equipment that's good to have for baking with kids (toddler to elementary school age)?
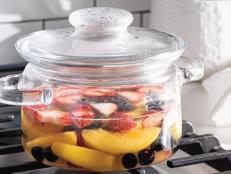
For children in elementary school and younger, I’d recommend having wood rolling pins, wooden spoons, stainless mixing bowls and, basically, anything that cannot break if dropped, such as Pyrex glassware.
Knowing children often get frustrated when they can't do certain things, what are some good, easy steps they can help with?
If you’re still introducing your child to baking, start by assigning them the simple, easy tasks they’ll be able to do and will give them a sense of accomplishment. Let them wash the ingredients (like apples for apple pies), put them in charge of the measuring cups, including measuring and pouring the ingredients, etc. Of course, don’t forget to let them lick the spoons, making clean up time all the more fun and easier!
What are your top dos and don’ts for baking with kids?
Keep it fun and simple! Mistakes can and will most likely happen, so be patient and turn mistakes into happy teaching moments. Remember, they’re still learning this new skill and it can be tough. Don’t forget to praise work well done and let them be creative with the food presentation and decorating.
Lastly, educate them throughout the process. Tell stories of where the recipe came from, who made it with you as a child, your favorite things to bake when you were younger, etc. Some of my favorite childhood memories include baking alongside my own grandmothers, so I know the importance of making these moments special and how adding a homemade touch can leave a lasting impression.
Susie’s Famous Holiday Cut-Out Sugar Cookies
Equipment: Mixer, paddle, medium mixing bowl, whisk, measuring cups and spoons, rolling pin and cookie cutter.
Oven: Preheat to 350 degres
Ingredients:
- Unsalted Butter — 1 cup
- Granulated Sugar — 1 cup
- Vanilla Extract — 1 1/2 tsp.
- Whole Eggs — 1
- Baking Powder — 2 tsp.
- Salt — 3/4 tsp.
- All-purpose flour — 3 cups
1. Preheat oven to 350 degrees
2. Place butter and sugar in your mixing bowl with paddle attachment and cream together until smooth (approximately 2-3 minutes).
3. Add egg and vanilla.
4. In a separate bowl, whisk together baking powder, salt and flour.
5. Slowly add the dry ingredients to the butter mixture.
6. Once the dough comes together, pull off the mixer and finishing kneading dough by hand for 30 seconds.
7. Roll dough onto a floured surface to about 1/8 of an inch and cut with desired cookie cutter shape (Christmas tree, snowman, candy cane, etc.).
8. Bake for approximately 10 minutes or until slightly golden brown around the edges.
9. Let cool at room temperature or cool to touch.
10. Frost and fill with your favorite buttercream.
11. ENJOY!
Mint Buttercream
Note: Makes one quart of buttercream.
Ingredients:
- Butter — 12 oz
- Salt — 1/2 tsp.
- Powdered sugar — 1 lb. 4 oz
- Vanilla — 1 Tbsp
- Mint extract — 1 1/2 tsp
- Green gel color — 1 drop
- Milk — 3 Tbsp
This mint buttercream frosting is perfect for any chocolate cake or cupcake recipes. Don’t forget to top with festive sprinkles or crushed candy canes!
YOU MIGHT ALSO LIKE:


